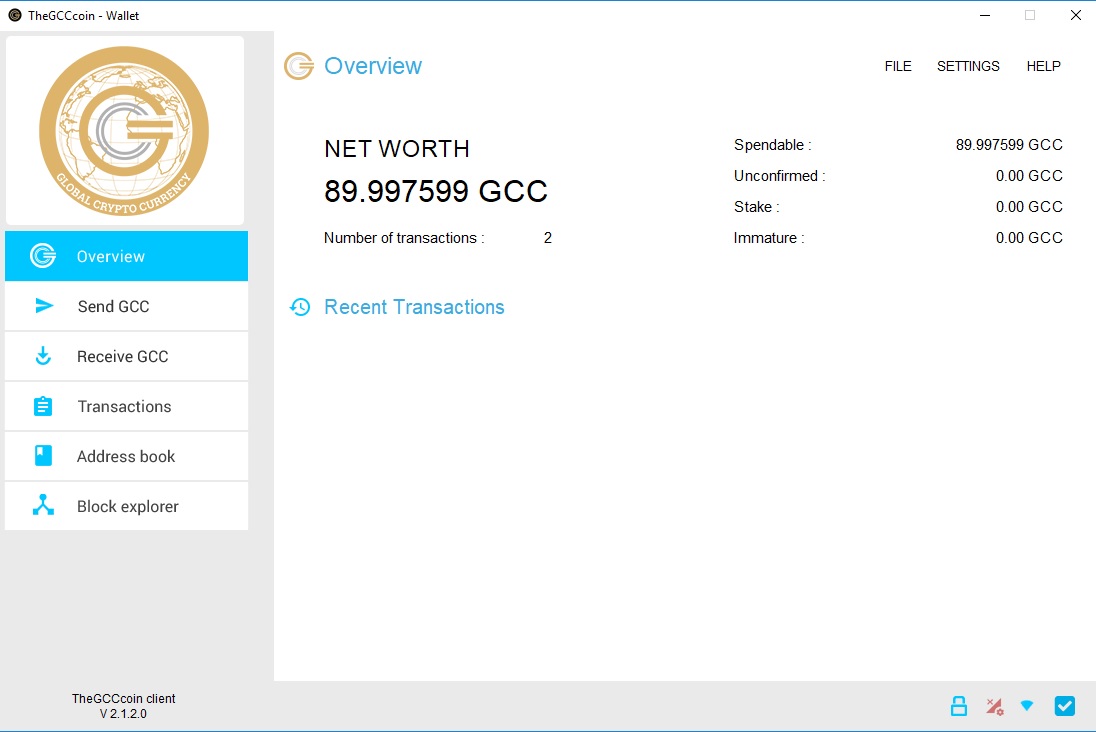
- Choose the GCC wallet application. Next, open it and wait until the blue sign in the right-bottom corner shows up. It will be a signal that the application is synchronized with the network and ready to work.
- Click RECEIVE GCC button on the left side of the application. There, a wallet address will show up. This is your address.
- You can create a signature for your address. Choose the proper address and it will be shown on the black bacground.
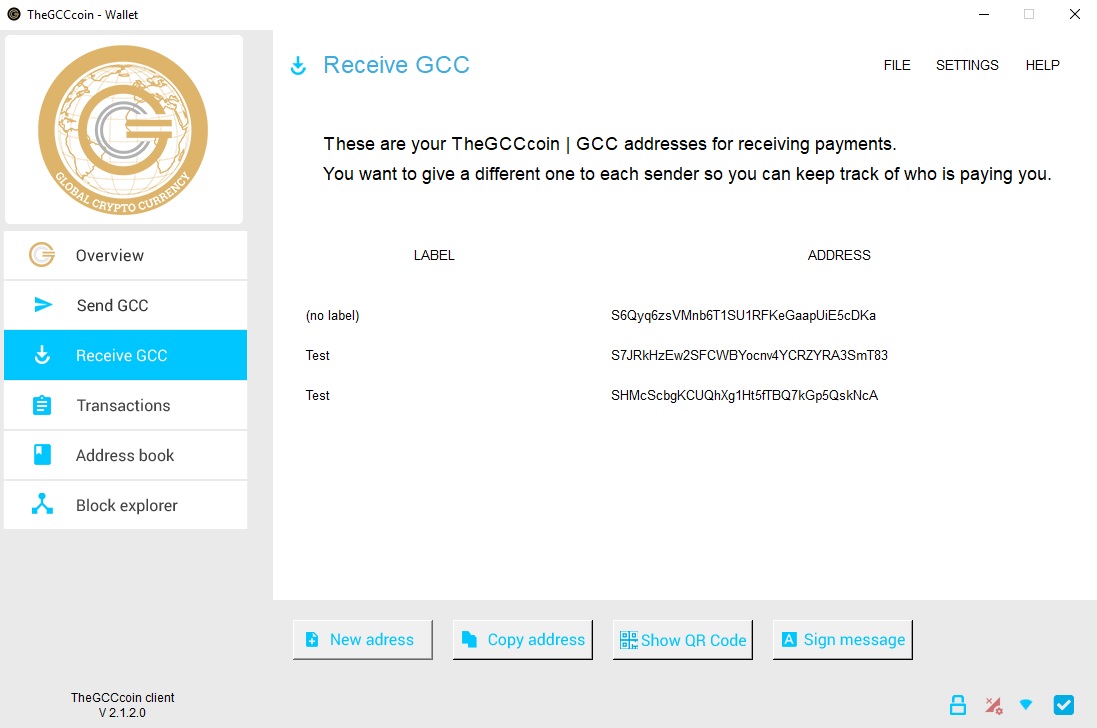
- Then, click on the SIGN MESSAGE button
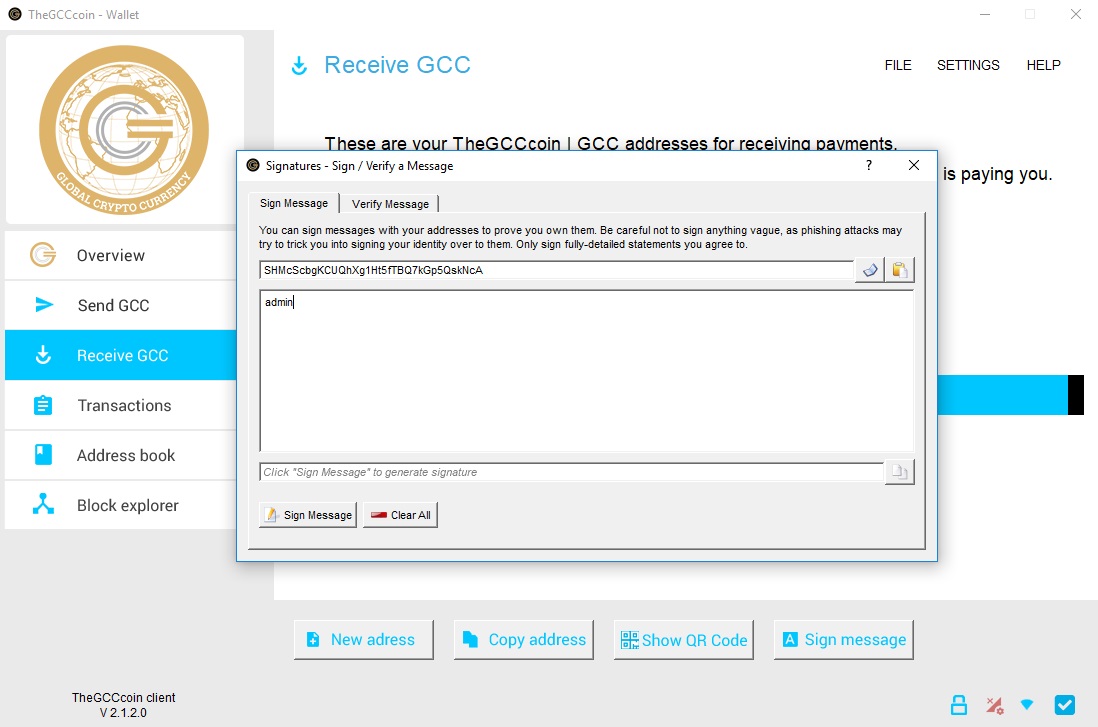
- A new window with three fields will appear – the program will automatically paste the address chosen before.

- Write your username in the second field (the biggest one), the same one you use on TheGCCGroup.com -> My Office – > Personal Profile-> Username. Remember about writing it correctly, with capital letters when needed, as always.
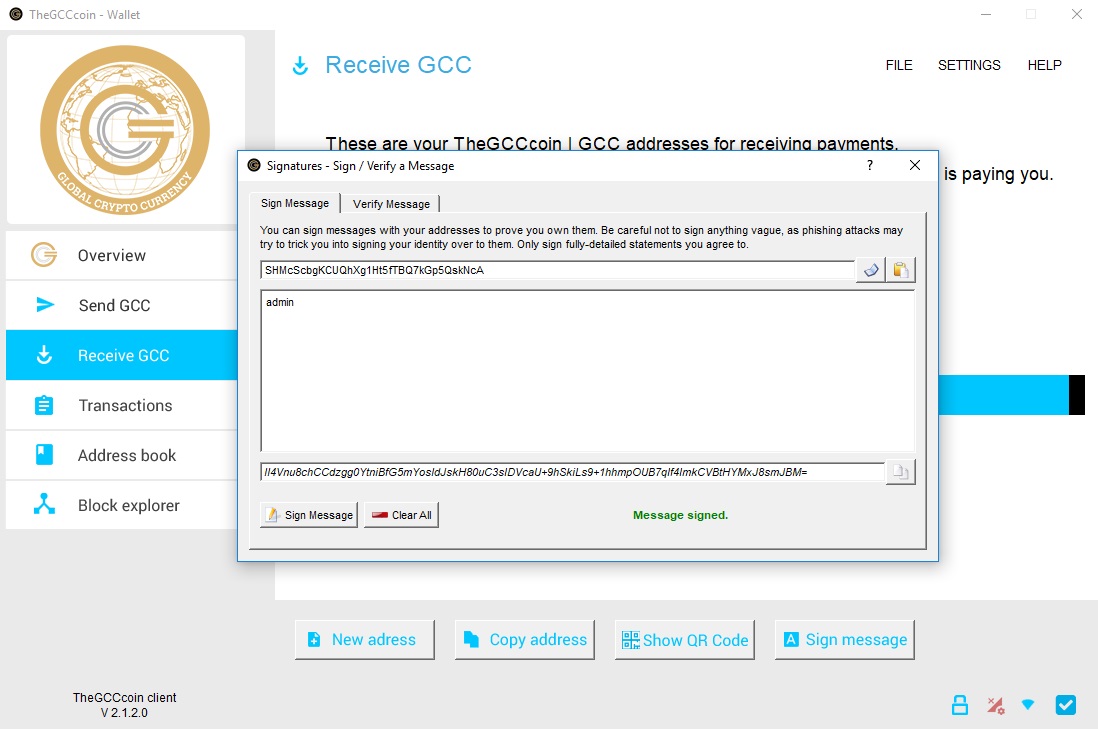
- After all fields have been filled in, click SIGN MESSAGE. This will generate a code which will show up in the field number 3.
- Go to TheGCCGroup.com and login to the account connected with your username that you used in GCC wallet application.

- Go to My Office – > Wallet Verification

- In the first field, paste your wallet address, and in the second one – paste the code you generated before (by clicking on SIGN MESSAGE, point 7)
- Click SUBMIT.
